Vercel AI SDK Integration
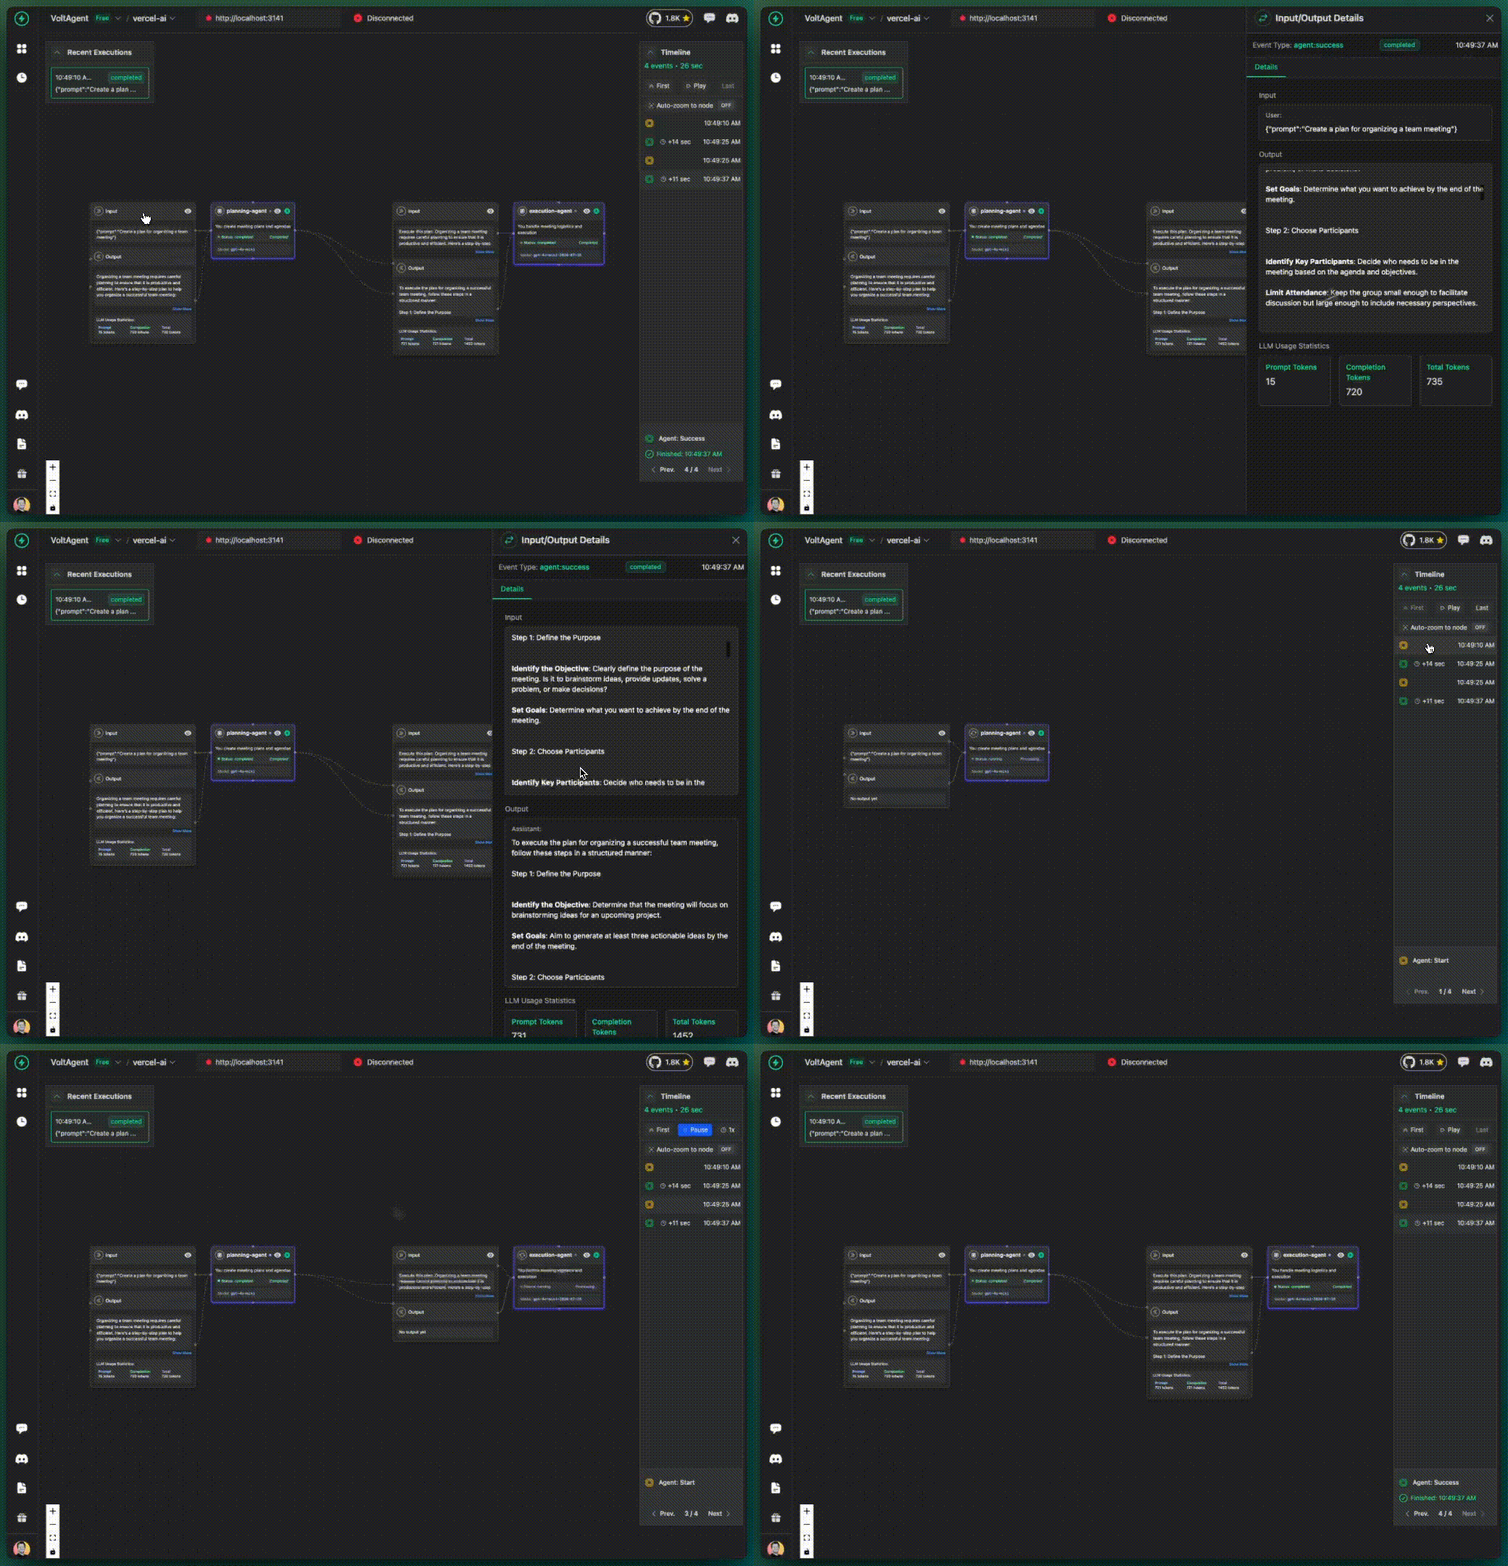
VoltAgent now works framework-agnostic and provides direct integration with Vercel AI SDK. This allows you to add observability to your existing Vercel AI applications with minimal changes.
Installation
First, install the required packages:
- npm
- pnpm
- yarn
npm install @voltagent/vercel-ai-exporter @opentelemetry/sdk-node @opentelemetry/auto-instrumentations-node
pnpm add @voltagent/vercel-ai-exporter @opentelemetry/sdk-node @opentelemetry/auto-instrumentations-node
yarn add @voltagent/vercel-ai-exporter @opentelemetry/sdk-node @opentelemetry/auto-instrumentations-node
Configuration
Get Your API Keys
You'll need to get your API keys from VoltOps LLM Observability Platform:
- Sign up at console.voltagent.dev
- Create an organization for your team/company
- Create a project within your organization
- Get your keys from the project settings:
VOLTAGENT_PUBLIC_KEY- For client identificationVOLTAGENT_SECRET_KEY- For secure server communication
Setup VoltAgent Exporter
Set up VoltAgent exporter in your application (typically in your main file):
import { VoltAgentExporter } from "@voltagent/vercel-ai-exporter";
import { NodeSDK } from "@opentelemetry/sdk-node";
import { getNodeAutoInstrumentations } from "@opentelemetry/auto-instrumentations-node";

// Create VoltAgent exporter
const voltAgentExporter = new VoltAgentExporter({
  publicKey: process.env.VOLTAGENT_PUBLIC_KEY,
  secretKey: process.env.VOLTAGENT_SECRET_KEY,
  baseUrl: "https://api.voltagent.dev", // default
  debug: true, // set to true for development
});

// Initialize OpenTelemetry SDK
const sdk = new NodeSDK({
  traceExporter: voltAgentExporter,
  instrumentations: [getNodeAutoInstrumentations()],
});

sdk.start();
Basic Telemetry
Start with the minimal setup - just enable telemetry in your existing Vercel AI calls:
import { generateText } from "ai";
import { openai } from "@ai-sdk/openai";

const result = await generateText({
  model: openai("gpt-4o-mini"),
  prompt: "Hello, how are you?",
  experimental_telemetry: {
    isEnabled: true,
    // That's it! VoltAgent will track this with a default agent
  },
});

console.log("Assistant:", result.text);
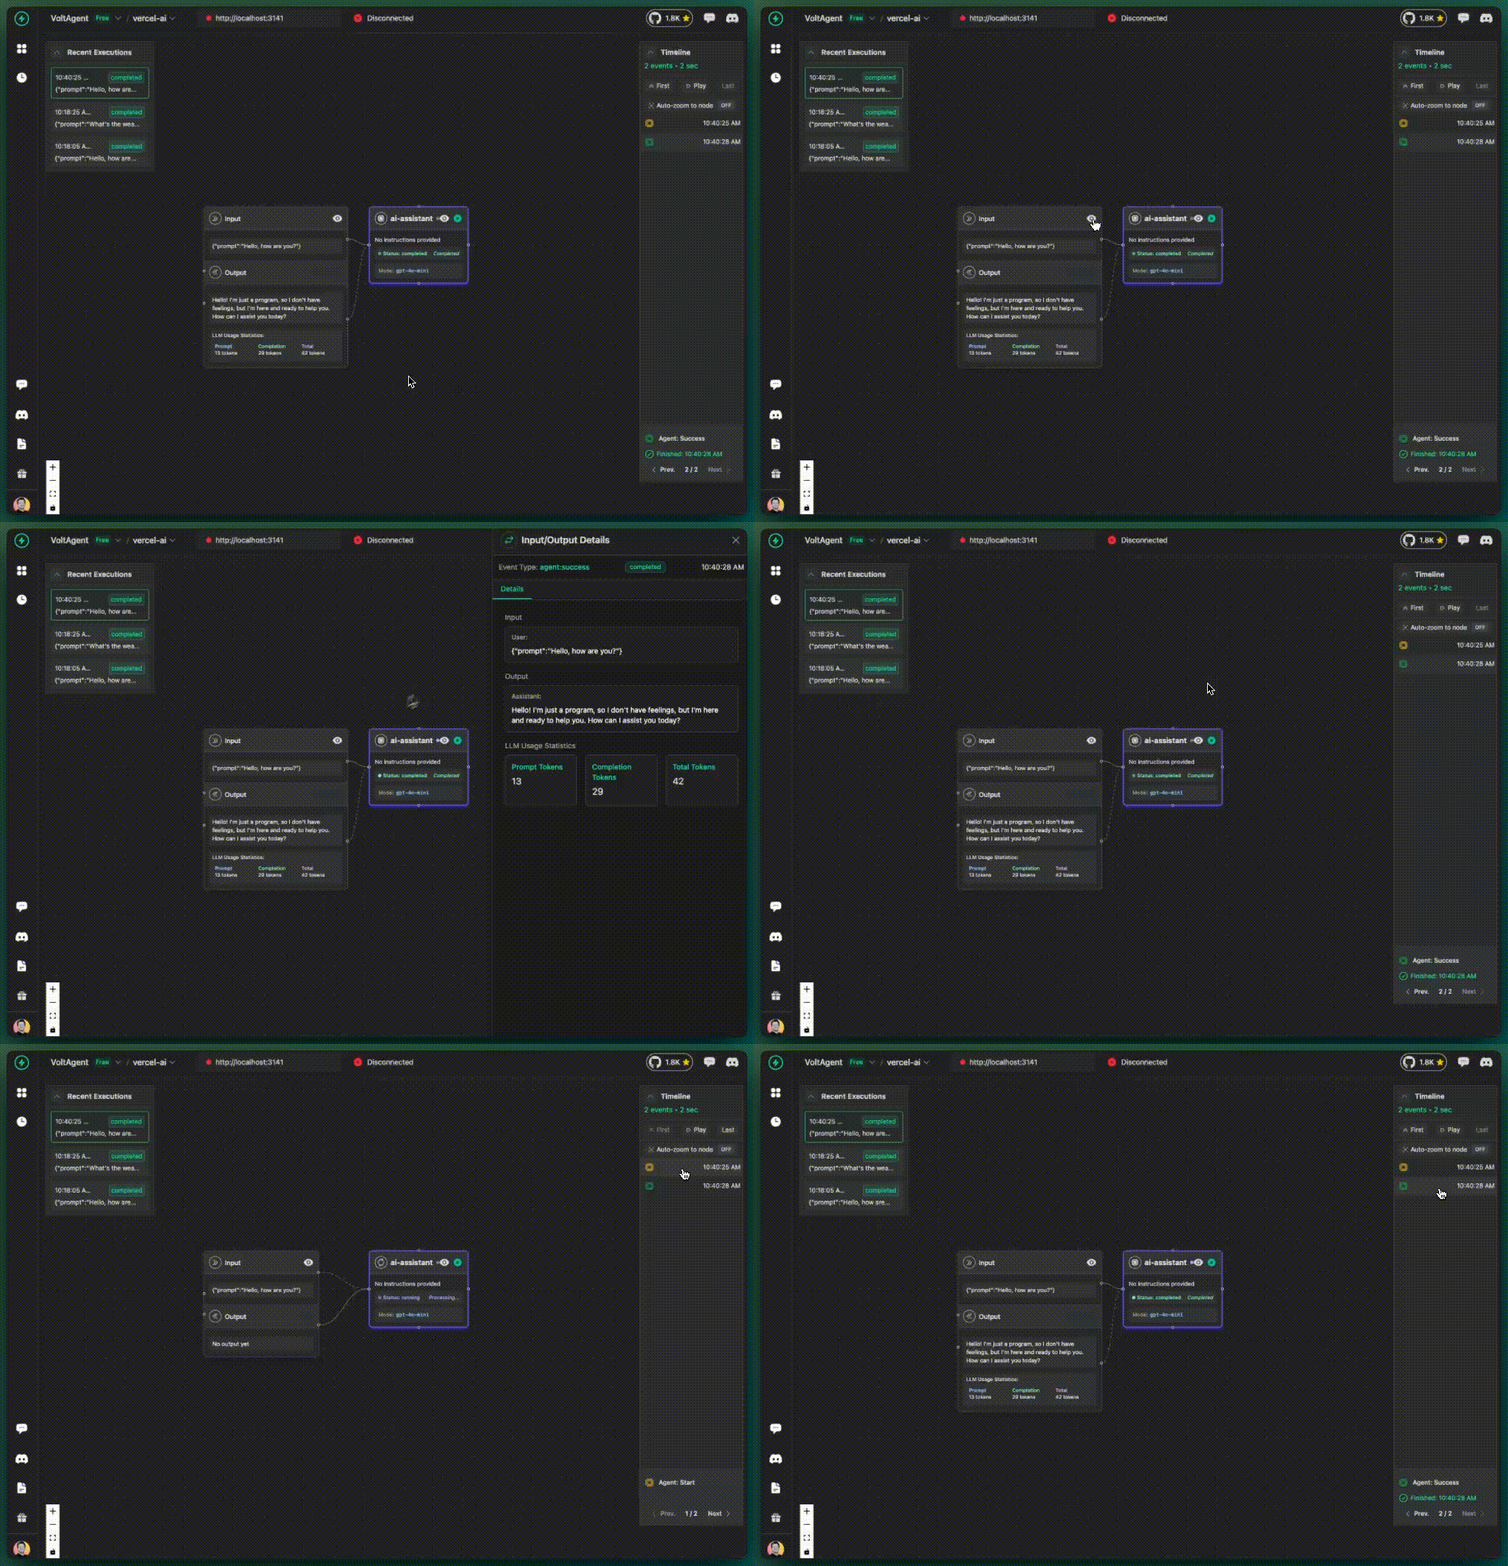
✅ What you get:
- AI calls tracked in VoltOps LLM Observability Platform
- Basic execution flow visibility
- All activities grouped under "ai-assistant" (default)
📋 VoltAgent: Using default agent for tracking.
💡 For better tracking, add agentId to your metadata:
   experimental_telemetry: {
     isEnabled: true,
     metadata: { agentId: 'my-agent' }
   }
This is completely normal! VoltAgent automatically uses a default agent when no agentId is provided. We'll show you how to customize this in the next sections.
With Tools
Same minimal setup, but now with tools to see how tool usage is tracked:
import { generateText } from "ai";
import { openai } from "@ai-sdk/openai";
import { z } from "zod";

const result = await generateText({
  model: openai("gpt-4o-mini"),
  prompt: "What's the weather like in Tokyo?",
  tools: {
    weather: {
      description: "Get the weather in a location",
      parameters: z.object({
        location: z.string().describe("The location to get the weather for"),
      }),
      execute: async ({ location }) => {
        // Simulate API call
        await new Promise((resolve) => setTimeout(resolve, 1000));
        return {
          location,
          temperature: 72 + Math.floor(Math.random() * 21) - 10,
        };
      },
    },
  },
  maxSteps: 5,
  experimental_telemetry: {
    isEnabled: true,
    // Still using default agent, but now with tools
  },
});

console.log("Assistant:", result.text);
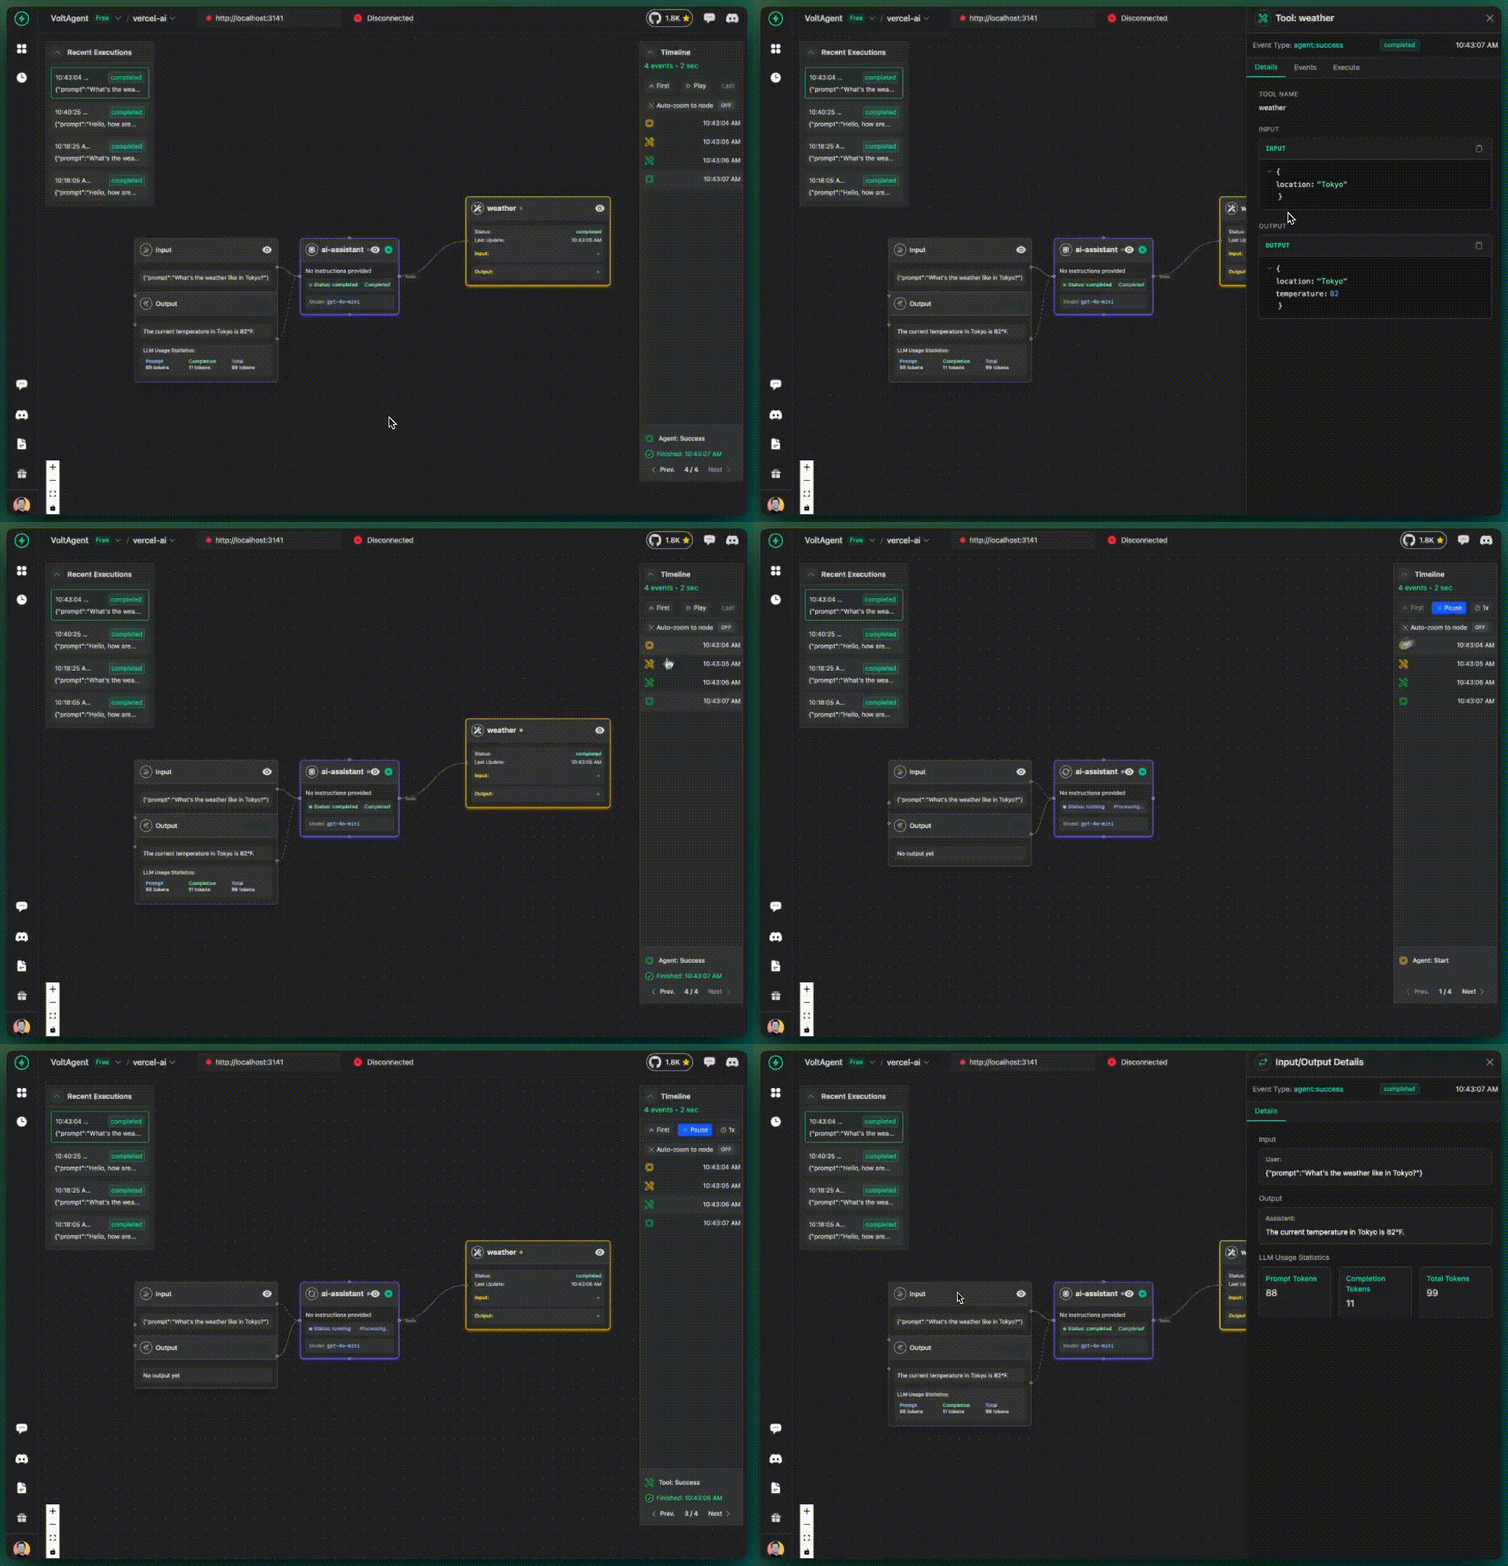
✅ What you get additionally:
- Tool calls tracked and visualized
- Tool inputs and outputs visible
- Tool execution timeline
- Still grouped under default agent
With Metadata
Now make tracking much more powerful by adding an agent identifier:
import { generateText } from "ai";
import { openai } from "@ai-sdk/openai";
import { z } from "zod";

const result = await generateText({
  model: openai("gpt-4o-mini"),
  prompt: "What's the weather like in Paris?",
  tools: {
    weather: {
      description: "Get the weather in a location",
      parameters: z.object({
        location: z.string().describe("The location to get the weather for"),
      }),
      execute: async ({ location }) => {
        await new Promise((resolve) => setTimeout(resolve, 1000));
        return {
          location,
          temperature: 18 + Math.floor(Math.random() * 21) - 10,
        };
      },
    },
  },
  maxSteps: 5,
  experimental_telemetry: {
    isEnabled: true,
    metadata: {
      agentId: "weather-assistant",
      instructions: "You are a helpful weather assistant",
    },
  },
});

console.log("Assistant:", result.text);

✅ What you get additionally:
- Your agent is now tracked under "weather-assistant" name
- Instructions are visible in the console
- Better organized execution history
- More meaningful tracking data
With Additional Metadata
You can provide additional context about the execution:
import { generateText } from "ai";
import { openai } from "@ai-sdk/openai";

const result = await generateText({
  model: openai("gpt-4o-mini"),
  prompt: "Tell me a joke",
  experimental_telemetry: {
    isEnabled: true,
    metadata: {
      agentId: "comedy-assistant",
      instructions: "You are a fun comedian assistant",
      userId: "user123",
      sessionId: "session456",
      // Any additional context you want to track
      environment: "production",
      version: "1.2.0",
    },
  },
});

console.log("Assistant:", result.text);
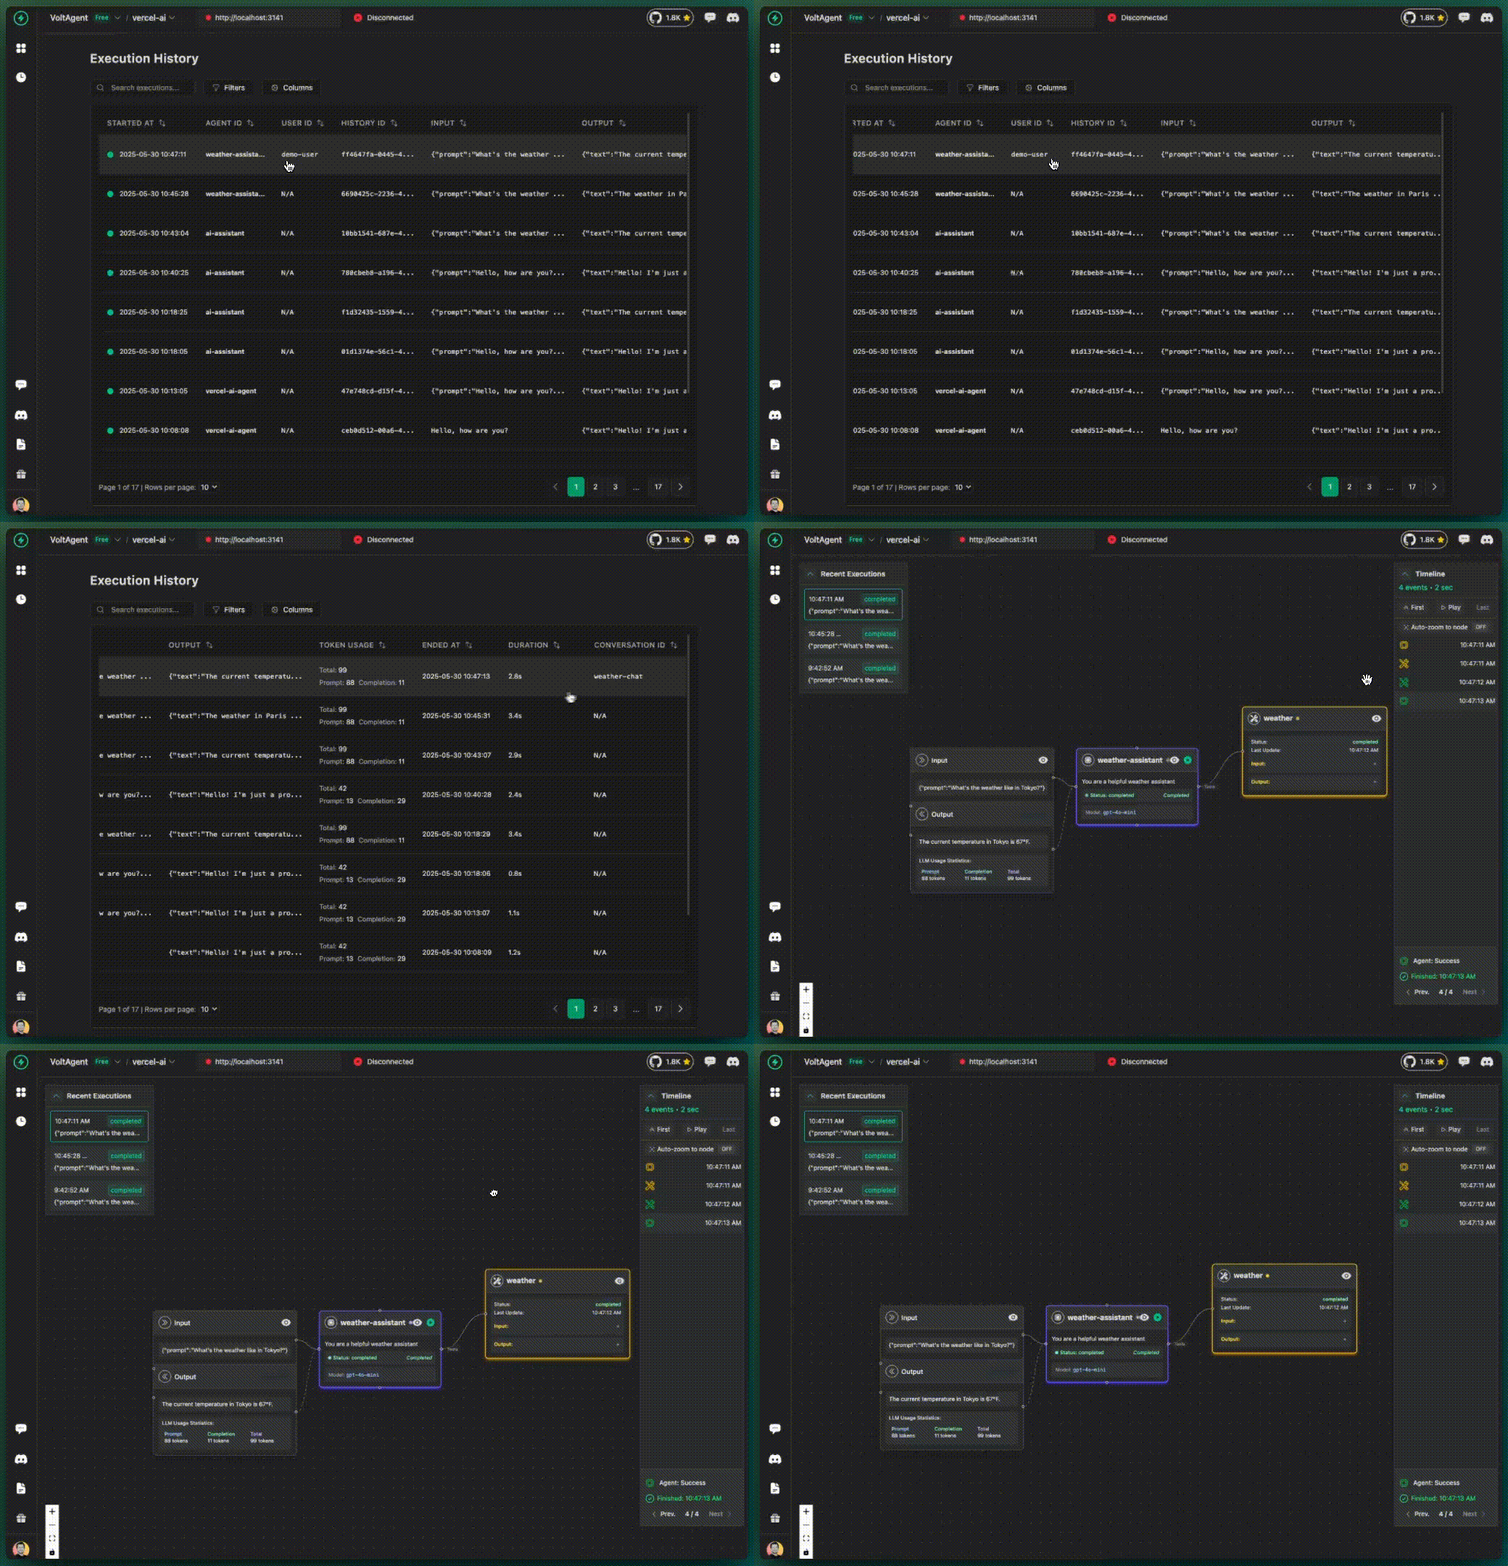
✅ What you get additionally:
- User and session tracking
- Environment context
- Version information
- Custom metadata for filtering and analysis
Multi-Agent Workflows
Track different agent roles within the same application:
import { generateText } from "ai";
import { openai } from "@ai-sdk/openai";

// Research agent
const researchResult = await generateText({
  model: openai("gpt-4o-mini"),
  prompt: "Research information about renewable energy trends",
  experimental_telemetry: {
    isEnabled: true,
    metadata: {
      agentId: "research-agent",
      instructions: "You are a research specialist focused on gathering factual information",
      role: "researcher",
    },
  },
});

// Writing agent
const articleResult = await generateText({
  model: openai("gpt-4o-mini"),
  prompt: `Write an article based on this research: ${researchResult.text}`,
  experimental_telemetry: {
    isEnabled: true,
    metadata: {
      agentId: "writing-agent",
      instructions: "You are a professional writer who creates engaging articles",
      role: "writer",
    },
  },
});

// Review agent
const reviewResult = await generateText({
  model: openai("gpt-4o-mini"),
  prompt: `Review and improve this article: ${articleResult.text}`,
  experimental_telemetry: {
    isEnabled: true,
    metadata: {
      agentId: "review-agent",
      instructions: "You are an editor who reviews and improves content",
      role: "editor",
    },
  },
});

console.log("Final article:", reviewResult.text);
✅ What you get with multi-agent tracking:
- Each agent tracked separately in the console
- Clear visualization of agent interactions
- Role-based organization
- Workflow understanding across agents
Advanced Features
Custom Spans
Add custom spans to track specific operations:
import { trace } from "@opentelemetry/api";

const tracer = trace.getTracer("my-app");

const result = await tracer.startActiveSpan("user-request-processing", async (span) => {
  span.setAttributes({
    "user.id": "user123",
    "request.type": "question",
  });

  const response = await generateText({
    model: openai("gpt-4o-mini"),
    prompt: "What's the capital of France?",
    experimental_telemetry: {
      isEnabled: true,
      metadata: { agentId: "geography-assistant" },
    },
  });

  span.setAttributes({
    "response.length": response.text.length,
  });

  span.end();
  return response;
});
Error Tracking
Automatically track errors in your AI workflows:
import { trace } from "@opentelemetry/api";

try {
  const result = await generateText({
    model: openai("gpt-4o-mini"),
    prompt: "Some prompt that might fail",
    experimental_telemetry: {
      isEnabled: true,
      metadata: { agentId: "error-prone-agent" },
    },
  });
} catch (error) {
  const span = trace.getActiveSpan();
  if (span) {
    span.recordException(error);
    span.setStatus({ code: 2, message: error.message });
  }
  throw error;
}
Best Practices
1. Use Meaningful Agent IDs
// ❌ Not helpful
metadata: {
  agentId: "agent1";
}

// ✅ Descriptive and helpful
metadata: {
  agentId: "customer-support-agent";
}
metadata: {
  agentId: "product-recommendation-agent";
}
metadata: {
  agentId: "content-writer-agent";
}
2. Include Context
// ✅ Rich context for better tracking
metadata: {
  agentId: 'support-agent',
  instructions: 'Help customers with technical issues',
  userId: userId,
  sessionId: sessionId,
  category: 'technical-support',
  priority: 'high'
}
3. Environment Variables
# .env
VOLTAGENT_PUBLIC_KEY=your_public_key
VOLTAGENT_SECRET_KEY=your_secret_key
VOLTAGENT_BASE_URL=https://api.voltagent.dev
4. Development vs Production
const voltAgentExporter = new VoltAgentExporter({
  publicKey: process.env.VOLTAGENT_PUBLIC_KEY,
  secretKey: process.env.VOLTAGENT_SECRET_KEY,
  debug: process.env.NODE_ENV === "development", // Only debug in development
});
Troubleshooting
Common Issues
- No data showing in console: Verify your API keys and network connectivity
- Missing spans: Ensure telemetry is enabled and SDK is initialized
- Performance impact: Use batch processing in production
Debug Mode
Enable debug mode to see detailed logs:
const voltAgentExporter = new VoltAgentExporter({
  // ... config
  debug: true, // Enable detailed logging
});
You'll see helpful logs like:
[VoltAgent] Exporting span: ai.generateText
[VoltAgent] Metadata: {"agentId":"my-agent"}
[VoltAgent] Successfully exported to VoltAgent
Next Steps
- VoltOps Platform - Learn about real-time debugging
- Langfuse Integration - Advanced analytics platform
- Production Deployment - Best practices for production use
Need help? Join our Discord community or check out our GitHub discussions.